
| Making Lens Flare Textures |
All crummy lens flares have one thing in common: bad textures. If you use good-looking lens flare textures, then it's hard to go wrong. So, in this text I'll show you how to make what I think are the best shapes and patterns to use in lens flares.
Alright, here's what they look like:
|
|
|
|
|
Why no funky shapes like you may have seen in other lens flares? Yes, that's right... because they look stupid! "But, they're physically realistic..." oh shut up, they look lame so we won't be using them. :)
Now that we know what good lens flare textures look like, let's write some code to make them.
The first four are really easy. You'll notice right away that they're all radially symmetric, so all we have to do is figure out the radius at each pixel, chew on it a bit, and spit out some color. Here's what it boils down to in code:
R = min( width, height )/2
for each pixel x,y
    dx = R-x
    dy = R-y
    r = sqrt( dx*dx + dy*dy )/R
    color(x,y) = some munging of r
|
Where I wrote 'some munging of r' we want to do the code specific to each
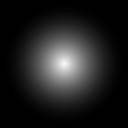
flare. This is what I used for the images above:
 |
// (1-r)^2 c = 1-r; c = c*c; if (r>1) c=0; |
 |
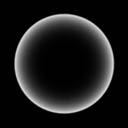
// r c = r; if (r>1) c=0; |
 |
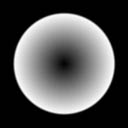
// r^6 c = r*r; c = c*c; c = c*c*c; if (r>1) c=0; |
 |
// ring of width .2 and radius R c = 1-fabs(r-.9f)/.1f; if (c < 0) c = 0; c = c*c; c = c*c; |
For all of these, the color value (c) we produce is between 0 and 1. Assuming you're making a 32-bit texture, the value to put in the color buffer is:
byte b = c*255 dword clr = b | (b<<8) | (b<<16) |
  |
If you code that straight out, you're going to get very rough
edges around the flare. This comes from the
if (r>1) c=0; statement. What we want
instead is a function that smoothly blends the color out.
We'll make a function like Renderman's smoothstep to do this.
The equation it uses is: 3x^2 - 2x^3, giving a nice transition
between 0 and 1. Here it is in code:
|
Well, that does it for the easy textures now onto the interesting part.
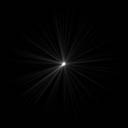
For the last texture, what we want is a bunch of light rays emanating from the center of the image. To do this, you could take an atan2 at every pixel and use the result as an index into a 1-d array of color values, then mess with the resulting image until it stopped looking like crap, or you could save yourself some time and just shoot additive particles from the center pixel. I've chosen the latter approach and here's how it's done:
create temporary buffer to accumulate pixel values
initialize buffer values to 0

for each particle
    (pick a random direction)
    angle = (rand() / RAND_MAX) * 2*pi
    dx = cos(angle)
    dy = sin(angle)

    (push particle along this path)
    fx = width / 2
    fy = height / 2
    for each step
        DrawParticle(buffer, fx, fy)
        fx += dx
        fy += dy

normalize values of buffer and move to texture
|
For the DrawParticle function you can do a variety of things to achieve different looks. For example you can have the particle's brightness die off as it gets farther from the center, you can have the borders of the particle decrease instead of increase values in the temporary buffer, or you can use different shapes for the particle and rotate them as it extends from the center. Here's the simplest version:
function DrawParticle(buffer, fx, fy)
    for y = -partRadius to partRadius
        for x = -partRadius to partRadius
            r2 = x*x + y*y
            c = 1 - r2/(partRadius*partRadius)
            c = c*c
            c = c*c
            buffer(x+fx,y+fy) += c
|
Now that you have good lens flare textures, the real fun
begins: finding the right order, colors, and sizes for arranging them.
I'll leave that to you, but for the interested here's my preferred layout
